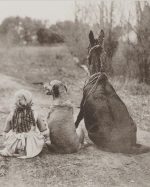
Daddy’s Peanut Candy Delight

As a small child growing up in the hills of North Alabama, there was always one thing that would always make my ears perk up. That was my Daddy’s announcement that he was making his special peanut candy.

“When will it be ready, daddy?” I would ask.

“About thirty minutes,” he would reply. “I’ve got to shell peanuts first.”

With those words, my stomach would prepare itself for one of my favorite childhood treats.

Although my father Auburn Brooks was a man’s man, he was also quite handy in the kitchen and, while serving in the military, proved himself to be a capable baker. One of his favorite recipes he came away with from those days was the one for his famous peanut candy.

“Quick, easy and tasty,” he would say.

The final product looked and tasted like peanut brittle, but it was much softer and chewier than its time-honored counterpart.

With great fondness do I remember those days I would sit in the front porch swing nibbling away at his fresh peanut candy and watching the world go by.

The following recipe is published exactly as he wrote it so the ingredients and amounts are included in the body.

Auburn Brooks’ Peanut Delight

First, shell one pint of peanuts, then put peanuts in a flat pan.

Put in oven at 350 degrees; let roast for 15 minutes. While peanuts are roasting, use a four quart or larger boiler. Put in 1 1/2 cups sugar, 1/2  bottle of 16 oz. white Karo syrup and 1/2 stick of butter.

Bring to a boil and let boil for 10 minutes, no longer. When this is done remove from heat and put in 1 teaspoon soda; stir in very well. Next pour in peanuts and mix very well. 

Tear off a piece of foil larger than the cookie sheet you plan to use and place in pan. Butter the foil thoroughly.

Let candy set in boiler no longer than 10 minutes.

Pour out on buttered foil. I use a butter wrapper to flatten it out and spread.

Allow to cool for 30 minutes.

Break it apart and place in your serving dish.

Thanks for listening… and keep on smiling.

Audrey Brooks McCarver, August 22, 2022

Baking Bread to Relieve Stress

Believe it or not, baking bread can help relieve stress.

Since the day I started cooking as a teenager, I have loved working with yeast. Perhaps you do, too. It’s not difficult, but the yeast needs to be in date or it will result in a useless effort.

In this article, I am going to provide an easy recipe for bread that is not only delicious but will calm and soothe your nerves during the baking process.

My Daddy was a great story teller, probably because most of his stories were totally true. What follows is one of his favorite anecdotes, and one of mine, too. The episode he relates occurred over ninety years ago.

While stationed at Fort Benning, Georgia, Daddy worked in the base bakery part of the time, baking bread and pastries. One day a fellow baker was assembling a recipe for several loaves of bread when he realized he had put in much too much yeast.

Greatly wishing to avoid the trouble he knew would come to him when the boss discovered his mistake, the man rushed outside with the yeast, infused it with a large batch of dough, then threw the huge doughy glob into a big pile of sawdust behind the bakery building.

Hours later, the head baker came storming into the bakery and demanded to be told where that little mountain outside in the sawdust pile came from.

Both my father and the errant baker denied any knowledge of the “little mountain in the sawdust pile” and the head baker never learned the truth.

I suppose bread-baking history could be breath-taking or boring, depending on who’s talking or who’s listening. For the purposes in this article, however, a few remarks will suffice to satisfy our need for knowledge on the subject.

How did those intrepid pioneers of yesteryear manage to produce this life-sustaining loaf? Starting around 1850, they began using a baking kettle, a deep cast iron pan with three legs and a rimmed, close-fitting lid.

Then, in 1856, the bread baking process rose to a new height with the development of a soda-like ingredient made from lye and wood ashes, or baker’s ammonia. Pearlash consisted mainly of potassium carbonate, which produces carbon dioxide quickly and reliably. However, being difficult to make, it was also caustic and smelly. If yeast was being used and it was good, then “a little leaven leaveneth the whole lump.” If the yeast was finicky, then the diner would be forced to devour flat, dense dough.

Then something wonderful happened—baking powder came to be in existence and started to appear in everyone’s cabinet. It simplified a heretofore tedious, onerous undertaking and opened the baking process up to new and easy possibilities. 

Happily, for the modern cook, we don’t have to know the complete history of baking to produce a delightful dish. Further we can enjoy working with yeast because we know there is a backup plan in case our first efforts fails.

FOR THIS BREAD YOU WILL NEED:

>.  2 cups warm water (110 degrees)

>.  1/2 cup white sugar

>.  1 1/2 tablespoons active dry yeast

>.  1 1/2 teaspoons salt

>.  1/4 cup vegetable oil

>.  5 to 6 cups flour ( either bread flour or all purpose)

INSTRUCTIONS:

First, I find it essential to put on an apron and some good music. Neil Diamond is encouraging and the right tempo, however, you might want to avoid “Morningside” because it is very sad.

1. Using a large bowl, dissolve 1 TBSP of the sugar in warm water and then stir in yeast. I use my heavy duty Kitchen Aid mixer with the dough hook. The dough hook is your new best friend and will save you a lot of time and hard work. Allow this to  proof until the yeast looks like a creamy foam, about 5 minutes.

2. Mix remaining sugar, salt and oil into the yeast. Mix in flour one cup at a time. I have my dough hook running on low speed as I add the flour. Dough will be tacky and clean the sides of the bowl, except a small part at the bottom. If you use too much flour the bread will be dry, so have a little extra warm water in case you need to thin the dough.

3. Knead the dough for 7 minutes. This is what the dough hook does, this is its reason for existing. Let it work for you. Place the dough into a well-oiled plastic or glass bowl, and turn dough to coat. Cover with  damp paper towels or cloth, nothing heavy or the bread won’t rise.

Allow it to rise until doubled in size, about 1 hour.

4.  Punch down dough. Herein lies the stress relief I promised. Knead for 1 minute and divide in half. Shape into two loaves and place in two greased loaf pans. Allow to rise another 30 minutes, or until the dough is one inch above the pans.

5.  Bake at 350 degrees for 30-40 minutes.

Cool, brush with butter or slice and add softened butter and honey. 

Thanks for listening……..Keep smiling!

Audrey McCarver. 8-15-2022

Southern Mac and Cheese

Don’t most people like macaroni and cheese?  Seems so to me. Somewhere long ago some forward thinking cook decided to combine two of my favorite ingredients–macaroni and cheese–to make a delicious and simple main dish or side dish.

By itself, macaroni is just about tasteless, but combine it with other ingredients and it can become a magical, flavorful, mouth-watering experience.

I prepare Mac and cheese the usual way with the good results. However, I also make a Mac and Cheese casserole that will serve as the center of a meal; just add desired extras. 

This dish can be started, finished and ready to eat in an hour.

This dish does not depend on precise measurements and amounts, so play with it and develop your new favorite go-to Mac and Cheese recipe.

INGREDIENTS

Macaroni

Hamburger (at least a pound)

Butter

Milk

Cheddar Cheese Soup or Cream of Mushroom Soup

Ritz or Town House Crackers

Salt and Pepper to taste

INSTRUCTIONS

Brown the hamburger in a skillet and break into small pieces. Add onion to meat when it is nearly done. Drain grease and set meat aside.

Boil the macaroni by the package instructions. When ready, drain in a colander.

In a large bowl, mix hamburger and onion, macaroni, soup and milk enough to make a good mixture. The macaroni will absorb much of the liquid, so add a little extra. I add melted butter just because I can.

Have a greased casserole dish prepared, add the mixture then top with shredded cheddar cheese. 

Put a few of the crackers at a time in a plastic baggie but don’t seal. Use either a rolling pin or your fist to pound the crackers to small bits. Spread this over your cheese. Repeat this step until the dish is completely covered. 

Melt more butter, a half stick or more. Drizzle crumbs with the butter.

Cook in a 350 degree oven until lightly brown, usually 30 minutes.

The final step is to ring the bell and call out: “Dinner’s Ready. Come and get it!’

Thanks for listening… and keep smiling.

Audrey McCarver August 12, 2022


Old-Fashioned Butter Rolls

Many years ago my mother made a book of recipes to be handed down to her children and grandchildren.

The book was a treasure trove of recipes from generations past, many concocted in order to utilize the ingredients on hand and produce tasty dishes.

During hard times, such as the Great Depression, my mother and her mother used these to produce fortifying, tasty desserts, seemingly from nothing.

One of those desserts was the butter roll.

“Back during Mama and Grandma’s time, they used what they had to make a meal,” my mother recalled. “We always had good meals, sometime seemingly out of nothing, but we always had a dessert. I have never seen this butter roll anywhere except at my home. I have made it many times for my family.”

Here is that recipe:

Pastry:

Put 2 cups plain flour into a bowl, sprinkle with salt and work in 2/3 cup shortening until it resembles meal. Stir in just enough ice water to make a stiff dough. Put on floured board (here I find a clean countertop better for rolling this), and use a floured rolling pin.

Roll, turn over on more floured space until it is very thin. Use small saucer and cut rounds around the saucer. Spread each round almost to the edge with softened butter, sprinkle generously with sugar, roll up tightly and place in a buttered baking dish.

Bake at 400 degrees until the rounds or rolls are browning slightly.

DIP:

Heat 1 1/2 cups milk with enough sugar to be sweet, add about a teaspoon vanilla. Have this very hot, but not boiling. Pour carefully over the rolls, return to oven for 10 or 15 minutes.

Better served warm.

P.S. This tip is mine: for a delicious variation on this recipe, combine dark brown sugar, cinnamon and finely chopped pecans. Sprinkle this over the buttered surface before you roll them up. 

Thanks for listening…. keep smiling!

Audrey McCarver August 10, 2022